| Importing Clients' Information |
|
Before importing your clients into Client Track, you must export your clients' information
first from one of the software packages listed on the left side of the menu. |
|
| Follow the instructions below on how to export your clients' information into a text/CSV file. |
|
|
|
| Exporting Clients From Sage Timeslips |
|
| STEP 1 |
|
| From the main menu in Sage Timeslips, go to File > . |
|
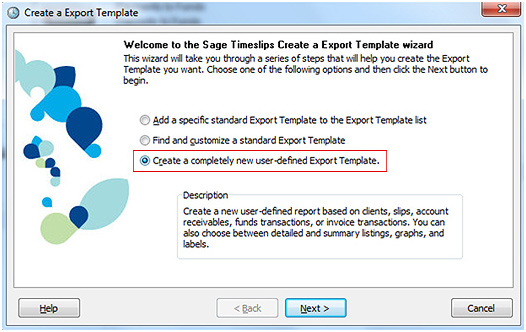
| STEP 2 |
|
 |
|
1) Select as shown above.
2) Click two more time to get to options on starting a new template. Click on the
clients contacts window to proceed to Step 3 below. |
|
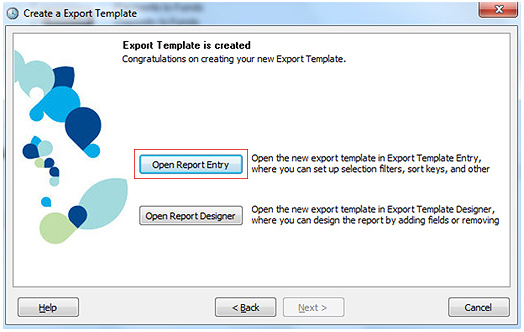
| STEP 3 |
|
 |
|
| After the export template has been created, click . |
|
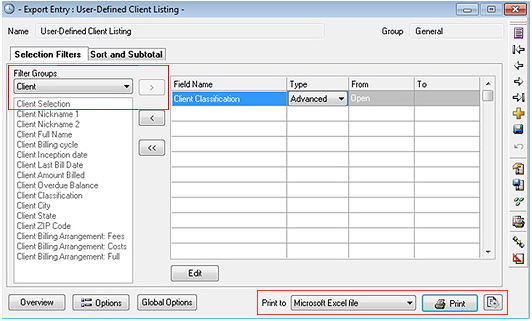
| STEP 4 |
|
 |
|
| 1) Under 'Filter Groups', select from drop down list. |
|
| 2) Click from list and then click to add item to the table. |
|
 |
|
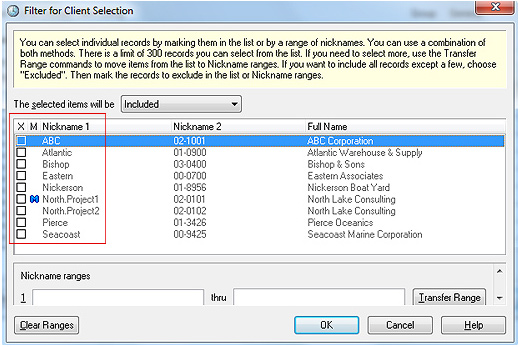
3) After item has been added, check off which clients you want to export under 'Nickname 1'
column as shown above and then click . |
|
4) In the previous window above, select besides 'Print to' and click .
This will create an export file in Excel that you can import into Client Track. |
|
| Note: There is no 'Select All' option, therefore, you will need to manually add clients. |
|
| STEP 5 |
|
| After export has been finished, click the link below to import file into Client Track. |
|
| > To import text/CSV file into Client Track, click here. |
|